Usually you develop your stuff locally and want to test the SSL encrypted stuff part too. With out a valid certificate, you always have to confirm the security dialogs, whether you are sure that you want to proceed. That annoys me each time. Furthermore you do not see, whether you have a problem with “mixed content”. In this article a show you how you can use „Let’s encrypt” certificates on localhost.
You will probably say that there are other methods like creating a local certificate authority or using a self signed certificate. That’s right, but I did not get it running in a reasonable amount of time. Since a couple of months „Let’s encrypt“ provides SSL certificates for free, so I thought, I’ll give it a try.
About “Let’s Encrypt”
„Let’s encrypt” is a not for profit organisation based in San Fransisco (USA). They are financially backed by enterprises like Cisco, Akamai and Hewlett Packard. Also well known open source organisations, like the Mozilla Foundation oder the Electronic Frontier Foundation, support the „Let’s encrypt”. The other supporters are big webhosters who can highly automate their process of generating and installing ssl certificates.
They provide SSL certificates at no cost in a highly automated manner. They only offer „normal“ certificates with a short 90-day lifetime. Certificates with “Organisation Validation“(OV) and „Extended Validation“(EV) are not planned. Sadly, the same is true for wildcard certificates, as this would make it much easier for many development domains. More information can be found at https://letsencrypt.org/.
How to use „Let’s Encrypt”
Basically there are two ways to create a certificate: a web-interface, which has to be provided by your provider. A full list of providers is available on the community website. If you have command line access and the necessary privileges, you can start right away. This is the preferred and most flexible version. Also it is required to use the letsencrypt certificates on local servers.
Prerequisites
Installed Cerbot
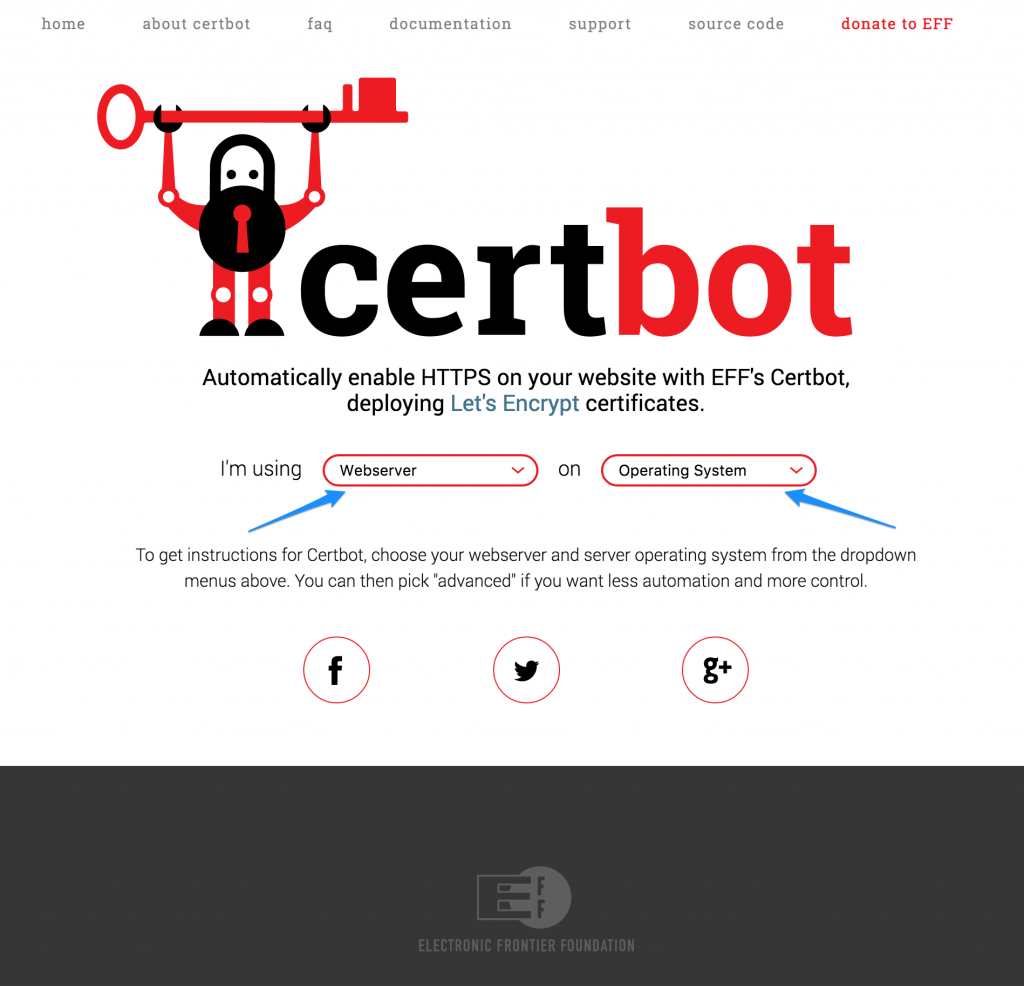
The first thing is that we need to install „certbot“. This is the recommended command line client to create the certificates. On https://certbot.eff.org/ you find a nice select menu to get directly to right installation and a quick introduction for installation and usage. It covers many unix-oid operating systems. If you are on another operating system, there is also a list of other ACME clients and libraries at https://letsencrypt.org/docs/client-options/.
For MacOS users using homebrew (like myself), the installation is as simple as running the following command:
brew update && brew install certbot
Publicly available domain
The second prerequisite is a publicly available domain which is accessible via port 80. A custom top level domain, like .dev, .mydev, or .whatever will not work. This is necessary, in order to authenticate the generated certificate. As I have many installations in my local development environment, I set up a URL-catch-all domain at my provider, in order to make the process easier.
Let’s Encrypt on localhost – Your first certificate
The command “certbot” provides several sub-commands which tell certbot what to do. The main sub-commands are “run” (which is the default), “certonly”, “install” and “renew”. Sometimes the sub-commands are also referred as plugins. For our first run, we will use „certonly“, because we do not want certbot to install the certificate.
Then we have to choose the authentication method. Available are “manual” and “webroot”. If you are using web server specific plugins like “apache” or “nginx”, they will use the “webroot” and install the certificate and update the configuration files accordingly. For the first run we will use manual. As we are on a local machine behind a firewall, manually copying the the authentication information is required.
With the option „domain“ you specify the domain name, for which you want to issue the certificate. It is possible to use more then one domain name per certificate. This is achieved by providing the option domain multiple times or by using the option „domains“. Then the domains must be provided in a comma separated list afterwards.
The option „email“ is used to send you information about the expiry of the your domains. As we are running certbot in a non-root environment, we must specify the directories to a path which is writable by the cli user. The last option „text“ is to use a plain text interface, otherwise it would be a ncurses dialog would be used. My favorite is plain text …
Here is the complete command. Replace the values to which are appropriate for you and fire the command.
certbot certonly \
    --manual \
    --domain t3trunk.dev.schwemer.eu \
    --email info@schwemer.de \
    --config-dir /usr/local/etc/letsenscrypt \
    --work-dir /usr/local/var/lib/letsencrypt \
    --logs-dir /usr/local/var/log/letsencrypt \
    --text
After some seconds you are required to take manual action: You must copy the authentication code to a specific location under the document root at the publicly available webserver.
The commands are:
ssh mylogin@remote-machine.org
cd <to_documentroot>
mkdir -p .well-known/acme-challenge
printf <copy the complete line from your local console>
Now make sure that this directory is served by your web server, as some installations do not allow a delivery of files, which are located below a dot-directory. If this is the case, switch back to your local console and hit <ENTER>. A few seconds later you will find your first „Let’s encrypt“ certificate in the specified config-dir in the sub-directory „live“.
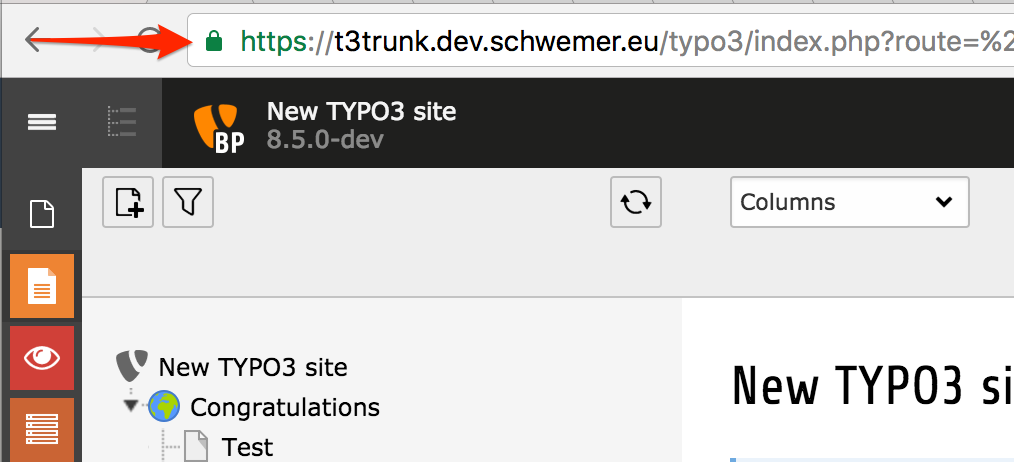
The last step is to add the certificate to your local web server / vhost configuration and restart it. Please refer to your web server documentation how to achieve this. Afterwards you should have a green adressbar feeling like this. :-)
Advanced topics for “Let’s encrypt” on localhost
Use configuration file
Having all options on the command line is quite a pain, if you use the certbot often (much to type) or very seldom (hard to remember). Therefore it is possible to put all option into an ini-file, which you can specify on the command line using the parameter -c. Using all options is possible without the leading dashes.
The option “domain” does not work in the config file, but there is the plural “domains”, which will accept the domains as a comma separated list.
Here is an example / template file for copy and paste …
# This is an example of the kind of things you can do in a configuration file.
# All flags used by the client can be configured here. Run Certbot with
# "--help" to learn more about the available options.

# Use a 4096 bit RSA key instead of 2048
rsa-key-size = 4096

# Agree to terms of service
agree-tos = True

# Uncomment and update to register with the specified e-mail address
email = info@schwemer.de

# Add new domains to existing cert
expand = True

# Uncomment and update to generate certificates for the specified
# domains.
# multiple "domain =„ lines will not work
# domains = example.com, www.example.com

domains = <domain-01>, <domain-02>

# Uncomment to use the webroot authenticator. Replace webroot-path with the
# path to the public_html / webroot folder being served by your web server.
authenticator = webroot
webroot-path = <your-webroot-path>

# Configuration Directory
# This is where the certs will reside
config-dir = <your-config-dir>

# Working Directory
# This is the workdir of certbot
work-dir = <your-work-dir>

# Logging Directory
# each run of certbot is logged here in a seperate log file for easy debugging
logs-dir = <your-log-dir>
Renew the “Let’s encrypt” certificates
As already said in the beginning, Let’s encrypt has a very short expire time of 90 days. The project recommends a renewal every two monts. But that is not a really drawback, because the renewal is completely automated. You just need to add a cronjob to your local machine with the sub-command „renew“. The command checks the config directory and will renew all certificates which are due. it is not necessary to specify domains or certificates. A typical crontab entry:
17 18 19 * * /path/to/cerbot renew -c /path/to/your/configfile-without-domains
You might wonder the time settings in the crontab entry. That’s by purpose. “Let’s encrypt” asks the users to run the renewal jobs not at same time, because this creates unnecessary peaks in the server load on their side.
The used config file must not contain any domains as certbot is checking all available certificates in the config-dir. Otherwise it leads to an error.
Expand certificate
Especially with (local) development domains, it is necessary, that you must add the one or another domain. The good thing is, that you do not need another certificate. With the option „expand“, you can as additional domains to the existing certificate. The new domain(s) are added to the certificate and all other domains in this certificate are checked. In the example above, this option is already set.
I decided to keep the domains outside of the config file, because a long list of domains is hard to read in the config file. The solution is to create a small shell script which calls the certbot with the appropriate domains. Here is the script, I use. You just need to replace the test* with your own domains.
#!/bin/sh

certbot certonly \
    -c ./certbot.ini \
    -d test10.dev.schwemer.eu \
    -d test10.dev.schwemer.eu \
    -d test11.dev.schwemer.eu
Handling many development domains
In the section „First run“ I used the manual – authenticator. If you have many domains, this procedure requires much manual work. Copying from cli to the remote server is not very user friendly … I found some tools / scripts on the web, which try to automate this, but none of them I trusted and they seem to be more or less a crutch. Finally, I found an issue for certbot connected with a gist containing a patch for the webroot authenticator.
The webroot authenticator copies the authentication information instantly to the path in the document root, triggers the authentication and deletes the information right afterwards. The patch makes certbot halt after generating the information and gives you the time to scp / rsync the authentication files to the remote web server. After hitting <ENTER> in certbot, it starts the authentication procedure and creating the certificate.
You can find the original gist here: https://gist.github.com/iamacarpet/fb4a8f424390c0352e93
The good thing is, that certbot is just a set of python scripts, which can be patched easily. Unfortunately this is only an intermediate solution as you have to patch certbot each time you get a new version. That means the patch probably must be rebased everytime you use a new release of certbot.
The second drawback is, that this will never hit certbot itself. The developers declined to add for good reasons. But the also promised to add hooks to the manual authenticator, which will allow to implement exactly such a behavior.
But for now it’s a good workaround IMHO. For version 0.9.3 I’ve added working patch to my gists: https://gist.github.com/mschwemer/65347e34ac0f821cd886702088ba917e.
Checking certificate content
There might be the case, that you want to check which certificate contains what data. Here the cli tool of openssl is your friend. Here is the command:
openssl x509 -in cert.pem -noout -text
Documentation and community
Quite an extensive online documentation for certbot is available at https://certbot.eff.org/docs/
Support is available at https://community.letsencrypt.org/
Conclusion
With a little bit of manual work, you can get green addressbar feeling in your local development environment. IMHO “Let’s encrypt” on localhost is quite usable. And I am glad not to accept the annoying security dialog any more.
Credits
Thanks to priyanshu28 for the blog post image provided on pixabay.

5
1