Since some years now the standard format for TYPO3 documentation is “Restructured Text“ (reST). As there are more formatting options as in „markdown“ (md), it is a little bit harder to write documentation and to control the outcome. This situation gets much better, if you know and use the sphinx extension.
The sphinx extension renders documents written in reST in well formed HTML code, a pdf or even json. If you want to know exactly, why you want to use EXT:sphinx … jump to the usage section. If you are already convinced, read on.
So how do you get there? As with any other software, some requirements must be met.
Requirements
Python
For the basic functionality you only need Python installed on the server, which is running the TYPO3 installation. The underlying software Sphinx is written in python. Most linux servers and all MacOS system have it already preinstalled. You can check it with the command
python --version
If you get some error, python is not installed or is not available in your PATH.
With the native python installation on MacOS X Yosemite and El Capitan, I get an error while installing “MarkupSafe”, a python module. I solved with installing python via homebrew.
LaTeX – Distribution
If you want to have a very nice pdf rendering, you will need a Tex distribution. For MacOS there is MacTeX. You can download it from https://tug.org/mactex/mactex-download.html or ftp://ftp.fu-berlin.de/tex/CTAN/systems/mac/mactex/. But be sure to have a good internet connection: It is a 2.5GB download. As an alternative you can use the torrent network (https://tug.org/mactex/MacTeX.pkg.torrent).
The distribution installs itself into “/Library/TeX/Distributions/.DefaultTeX/Contents/Programs/texbin“. In older MacOS versions this directory was symlinked to „/usr/texbin“. Since „El Capitan“ the linking does not work any more, because of the rootless mode mode. If you want to use the latex commands from command line, you must add this path to your PATH variable.
Share-Font
The default TYPO3 font is the ShareFont family. In order to use it, you must download it and make it compatible with latex. In the extension manual the few necessary steps are explained:
Installation & Configuration
The installation process of EXT:sphinx has four steps.
1) Download the EXT:sphinx through the EM
The first step is as with any other extension: Just go to the extension manager, search for „sphinx“ and download and install it.
2) Execute the update script
The extension sphinx comes with an update script. It must be run right after installing the extension. This process may take a while. So be patient and wait for the script to finish. The update script searches for all available sphinx versions and lists them. Already installed versions are marked with green checkmark.
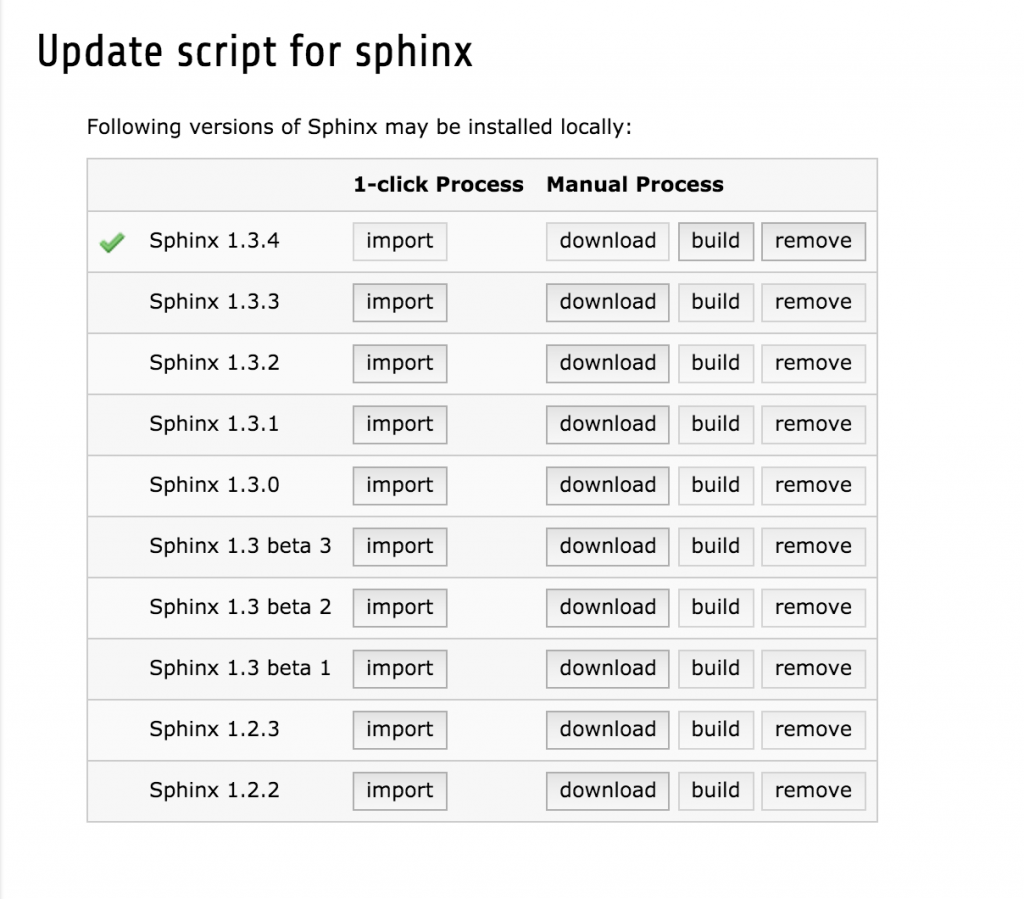
The update script offers four buttons for each version.
- The „Download“ button only downloads the sphinx stuff
- The „Build“ button configures sphinx as you configured it in the extension configuration. You must use this button every time you changed the extension configuration.
- The „Import“ button starts the download and the build of the sphinx script.
- With the “Remove” button you can delete sphinx versions from your system.
At this point I ran into the error message

Reason is that the „home“ option is specified in the installation scripts, but it seems, that the prefix comes from the python itself (at least in my installation).
You can fix this by adding a file named „.pydistutils.cfg“ to your home directory and put these two lines in it:
[install]
prefix=
Sphinx is downloaded and built in „typo3temp/tx_sphinx“. If something is going wrong while installing and building sphinx, you can check the extensive logfiles in this directory. But this location has also the implication, that, if you delete your typo3temp directory completely, all sphinx installations and configuration will get lost.
3) Configure the extension in EM
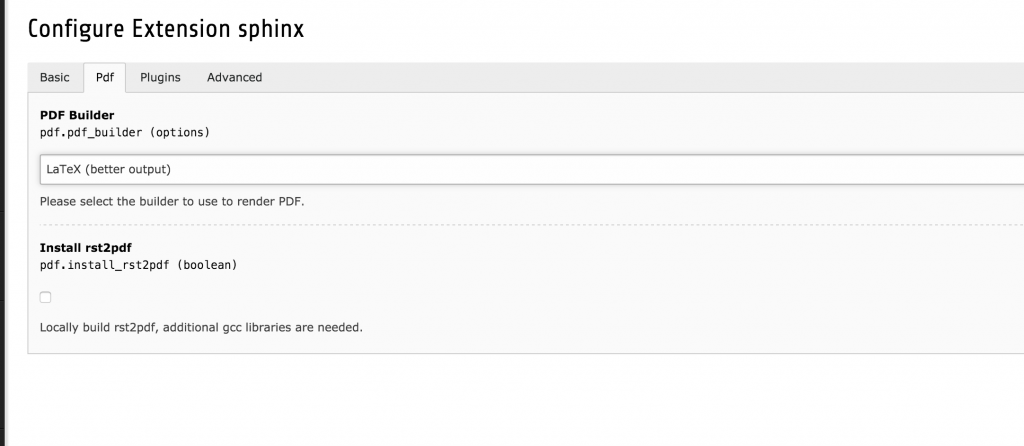
So you are now ready to configure sphinx. If you have installed a TeX distribution, you will choose the „Latex (better output)“ option here. The output is much much better than with the „rst2pdf“ builder. It is really worth the effort to install the TeX stuff.
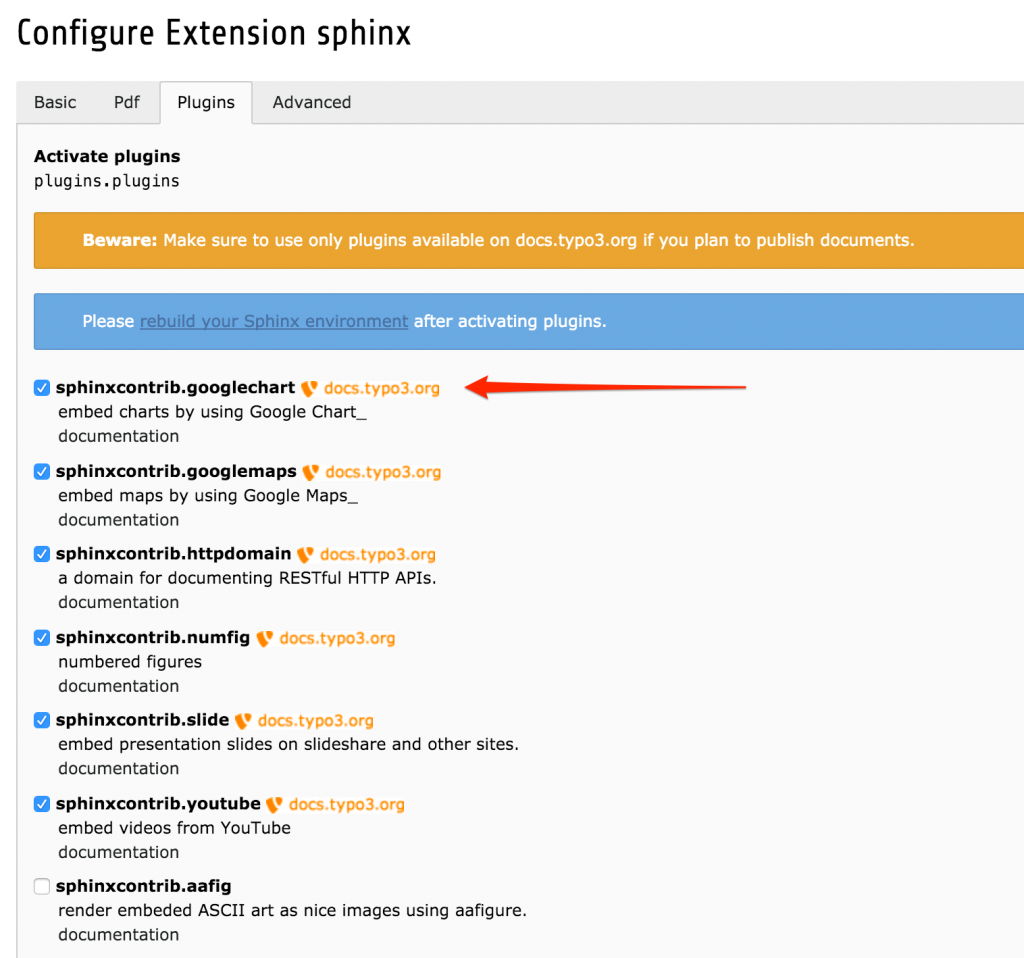
On the third tab you may add Sphinx plugins. If you need the functionality, you can add any of them. Those marked with a TYPO3 logo are installed on docs.typo3.org. All other will break the rendering on the TYPO3 documentation server. If you add or remove a sphinx plugin, the build script must be run again.
4) Configure TYPO3 InstallTool
The sphinx software needs to know, where the „pdflatex“ command resides. If it is not in the default PATH (as on MacOS), it must be configured in the install tool. The setting is named „binPath“ and can be found in the system section. The value needed for MacOS is “/Library/TeX/Distributions/.DefaultTeX/Contents/Programs/texbin“.
![Configure [SYS][binPath]](http://typo3worx.eu/wp-content/uploads/2016/01/sphinx_installtool-binPath-1024x540.png)
Usage
Extension Manager
Extensions, that provide their documentation as reST, receive three additional buttons in the Extension Manager. A click on one of these switches to the Sphinx documentation module and renders the manual in the desired format. Available formats are html, json and pdf.

Sphinx documentation module
The second access is via the Sphinx documentation module.
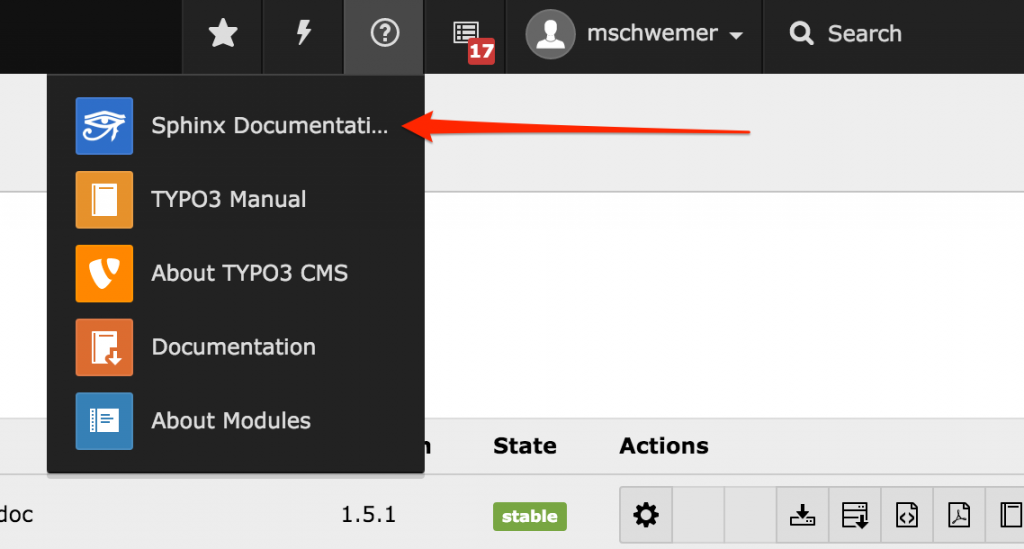
If you never have visited the sphinx documentation module, the first screen is the dashboard. The dashboard is mainly for starting new documentation projects. On the tab „Kickstart“ all TYPO3 extension on your installation that have no documentation are listed. If you move your cursor to the column „Action“, an icon for creating the documentation is shown.
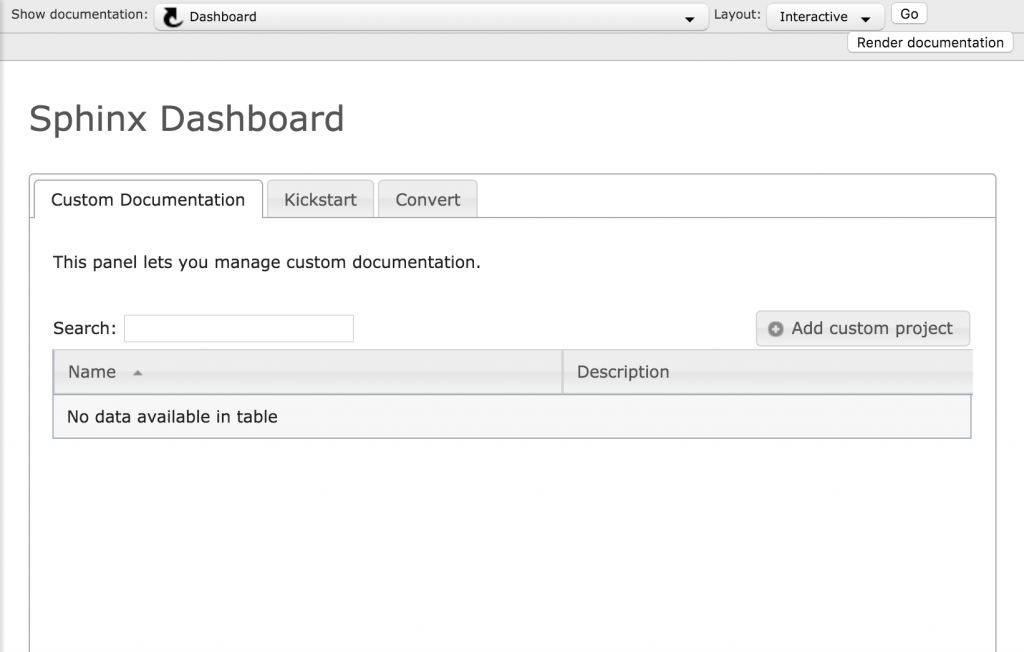
The „Convert“ tab provides functionality for converting the old sxw documentation to the new reST format. The converter is is not perfect, but it provides a very good starting point. It is way better and far more efficient than starting from scratch. I did this with the powermail documentation last year and this was really cool and time saving.
At the top of the module there is an extension selector, where you can choose the extension documentation, you would like to read. In the drop-down „Layout“ you can choose, which format you would like to see:
– pdf … ok that’s self explaining
– Interactive … that’s the normal rendering like on docs.typo3.org
– Static … offers a static view without the nice things from „interactive”
The „interactive“ view offers some very helpful features and bounties:

1) Editor
Yes, this is correct. EXT:sphinx comes with a complete reST editor with syntax highlighting. Clicking on the edit icon will open the editor.
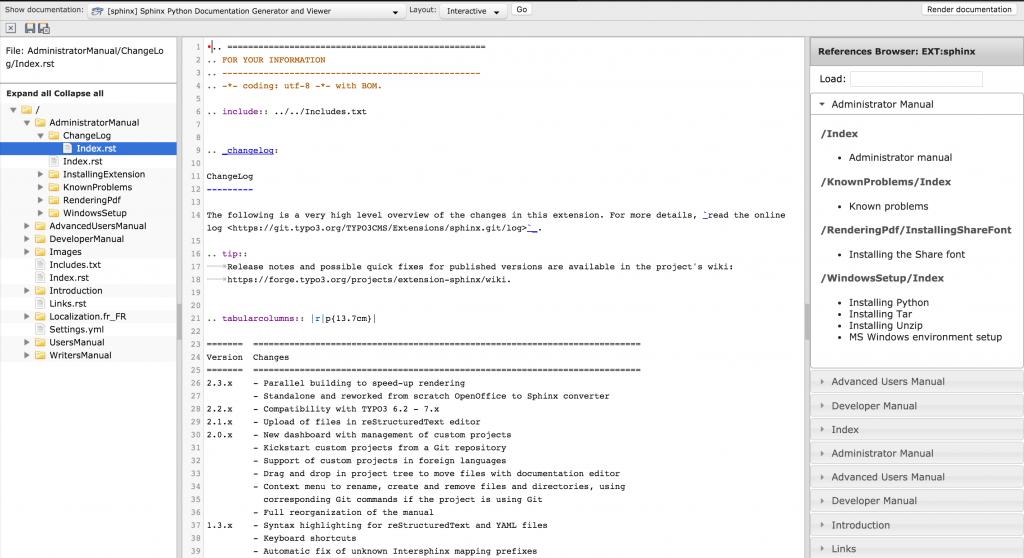
Changes are only shown, if you press the „Render documentation“ button in the upper right corner. A click on the save button is not sufficient. If you would like to distribute the documentation through other channels (f.e. e-mail), you can download it from the directory „typo3conf/Documentation/typo3cms.extensions.{extensionname}/default/{format}/“.
2) Rendering Warnings
If you made mistakes in the reST source, you can check the warnings and errors by clicking on the warning sign, next to the edit icon.
3) Language Switcher
If the extension provides the documentation in several languages, you can switch the language by clicking on one of the locales on the right top of the iframe.
And next?
In a blog post it is not possible to write a complete manual. This shall be a primer and motivation to explore and use it. The extension manual can be found on docs.typo3.org or via the sphinx documentation module itself (in case you installed it already).
If you need support, just contact the TYPO3 community via Slack. If you need an account, you can get one here: http://forger.typo3.org/slack
If you find any bugs or have feature requests, please report them on forge.
Thank you
Last but not least, I want to say a thank you Xavier Perseguers. He wrote and maintains this extension very actively. This extension makes writing and the QA of documentation really easy! Again: Thank you!


Of course you can also follow Martin Bless online documentation http://mbless.de/blog/2015/01/26/sphinx-doc-installation-steps.html and setup the environment yourself. So you can edit with your favorite editor and have all the power.
I’ve tried to cover the necessary steps, following Martins documentation, on a small shell script: https://github.com/DanielSiepmann/typo3-documentation-environment So you only have to clone and run the script and you are set.
Pingback: Guide to TYPO3 Documentation - Part 3: Contribution and ReST Helpers! - TYPO3worx
Pingback: Housekeeping TYPO3 Extensions - Stay on Track with TYPO3 Core | TYPO3worx - "The" TYPO3 Blog